Sunday, February 19, 2012

Making Time to Crochet

It's hard to always make time to crochet. I work full-time and care for a disabled husband. For a while there, I was almost obsessive about my craft time. For nearly 2 years I was crocheting every spare minute -- turning out hats (which were donated to cancer patients), gifts, items of clothing for myself, even purses!

But as always happens, I've hit a slump. I'm working on a gift, so I can't just ease up and let the inspiration return. In fact, after I finish this gift, I must start another right away for the upcoming birth of my first grandchild. How do I keep going? As much as I hate to admit it, I just have to force myself to set aside the hours and plug away.

But I have to admit, this slump may not be long lived. I absolutely love the way The Calico Crocodile shawl is shaping up. It's just beautiful as you can see.

Here is a close-up of the actual stitch pattern. It looks hard, and takes some getting used to, but the end result is always stunning.


I just started the third skein and will use that one completely -- I think the shawl will be the right size at that point. Then, as a final touch, the pattern calls for fringe and I intend to try to match the fringe to the stripes.

I think my sister will just love this shawl!

Tuesday, January 24, 2012

Too Tense or not Too Tense

Well, I've learned a valuable lesson with my latest project. I am crocheting a triangle shawl as a gift, using the crocodile stitch. I just love this stitch and the whole look of the thing.

In fact, I've made a bunch of hats with this stitch for my charitable work.

Anyways, I started this shawl, using an acrylic, wool, mohair blend yarn and was progressing along with the first skein when I noticed that the shawl was very small -- it looked like I would need a lot more yarn than I originally purchased and it was rather expensive. Since we are on a very tight budget, I knew that I couldn't buy any more, so with the second skein, I began loosening my tension.

Now, I've watched the "speed crocheters" on You Tube and even my 26 year old son crochets fast and rather loosely. So I asked him how he does it and after he explained, I began my 'loose' experimentation with the crocodile stitches.What an amazing difference!!! The shawl took on a beautiful lacey look. Not only that, but it was draping better and looking more like the pattern photos. I finished the 2nd skein and was progressing into the third when I suddenly realized -- the shawl looked WONKY!

The early tight rows bowed inward, while the later looser rows created a nice straight edge. I tried to stretch the lower rows -- no good. I tried to ignore it -- everyone else didn't seem to notice (in fact, I have been receiving rave reviews on this shawl). But I DID!

I pride myself on my beautiful stitch work and the professional look of my projects and this was just plain wonky.

So, over the weekend, I decided enough was enough. I began to rip out the shawl to the very beginning and start again.

Let me tell you, frogging out mohair yarn is not easy. It's not a matter of pulling the yarn and the work unravels. The halo strands of mohair tangle and tighten and all around drive one crazy, but I succeeded in stripping the shawl down to the first skein. I've stopped at this point and took one of the frogged skeins to begin again with my new loose technique. I am quite, quite pleased.

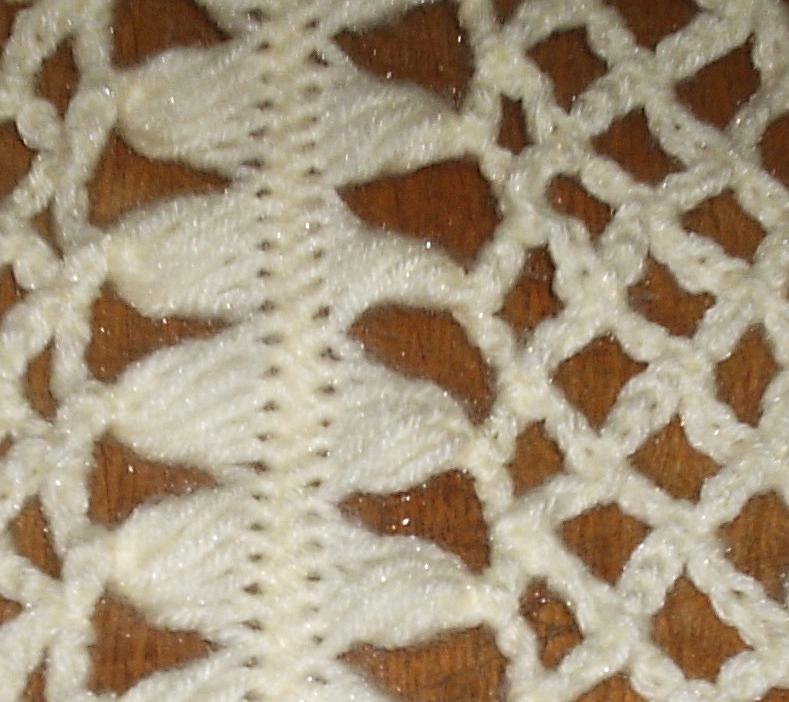
The piece on the top is the original and the darker piece on the bottom is my reboot with looser stitches -- what do you think?

Now, you may say, what about gauge? Didn't you test your gauge first? I know, I know -- all professional crocheters tell you that gauge is essential. I just HATE it. Besides, this pattern was open ended when it came to gauge. Since it is a triangle shawl that begins at the point and increases, the idea is to just keep adding rows until you get the size you want. Besides, no matter what I used to do, I could never quite reach the correct gauge. Now I know why -- my tension, though consistent throughout a project -- is just too tight to be adjusted by one hook size or sometimes even two hook sizes.

So the moral of the story here, dear friends, is to keep the loose tension from now on.

Besides, I'm actually becoming one of the speed crocheters now, too! :)

Thursday, August 25, 2011

Stone Path Hat

I feel bad that I haven't posted in a while -- only to post about a major loss in my life.

So to balance the sad with the good, I want to share one of my biggest crochet triumphs -- The Stone Path Hat.

As you can see, this hat pattern revives the knit Aran Sweater pattern of lines, wide cables, tight cables and popcorns. It is a true wonder of mathematical precision, designed by Lisa Naskrent. I obtained the pattern from a free e-book of crocheted hats through CrochetMe.com.

I did find, however, that the hat ends up too small, even when the gauge works out right.

Then again, I used regular worsted weight yarn (Caron's Simply Soft) and, I believe, a size "H" hook (unfortunately, I didn't write down the hook size on this first attempt) where the pattern called for sport weight and a size "E" hook. This hat will fit a small adult or pre-teen.

I made a second attempt, with mint green sport yarn and a size "J" hook. I also followed the pattern for the largest size and am extremely pleased with this second hat. It ended up just a tad large, but since this will be donated in my cancer hat project, a little large is good. I also finished it off with a slightly different edge -- forgoing the roll up brim.


This was a case of where I began with the written instructions. Unlike most patterns, I had to carefully mark off each pattern repeat and it took great concentration to make sure that I maintained the increases correctly. It was very important when I finally began the body of the hat and got into the full-fledged cables and twists and popcorns. At that point, I switched to the crochet symbol diagram as it gave me a clear impression of what each row looked like and how they interacted as a whole.

When making the mint green version, I discovered a great tip (darn! can't remember where now) that said to take recipe cards and transfer the symbol crochet pattern, one row to one card through one pattern repeat. WOW! What a great idea! I did exactly that. I recreated the symbols, line by line on 6 cards (6 rows make one full pattern). These were easier to carry and I never lost my place in the pattern. It made making the second hat a breeze!

What do you think?

Wednesday, August 24, 2011

Marian De Young: 1924 - 2011

My wonderful mom passed away in her sleep on Sunday, August 21. She would have been 87 at the end of this month.
Mom had a series of strokes within the last couple of years and has been bed-ridden for the last six months. Her passing was quiet and peaceful.

I love you, Mom!

Sunday, June 19, 2011

Hairpin Lace Scarf

I've finally finished (and photographed) the hairpin lace shawl I made for a young friend of mine who just graduated from the university.
Here is a shot of the shawl draped over my wicker form. This shawl is comprised of 5 strips of hairpin lace with the center strip having an extra twist in the loops.

As you can see in the photo above, I twisted the loops twice before joining with a stitch.

Okay, so now you've seen the finished shawl -- how did I make it? First, you need a hairpin loom and a crochet hook. By working around the loom and crocheting down the center, you create the base of a very pretty lace.


At the top of the photo, you can see the Boye Hairpin Loom that I recently purchased. I used Caron's Dazzleaire yarn in a lovely bone color. The pattern called for 240 loops on each side. In order to keep track of the loops as I worked (and to allow me to slide off completed groups), I used safety pins to hold 10 loops together. I could easily keep track of the number of loops this way. The pattern actually gathered only 5 loops at a time, which was also easy to keep track of with the 10 loop groups.

Once you've got a 240 loop strip complete, you join the 5 loop groups into an edge with chains in between.

Finally, you attach the strips together with more chains worked between the rows to form a pretty diamond pattern.

I am so very pleased with the finished piece, that I think that I will make myself the same shawl (pattern from Red Heart Yarn's Hairpin Lace Shawl). Maybe in a pale brown or dark green color for the fall season.

My next project is a cotton dress for my granddaughter, Alexa. Hope to show it off soon.

In my last blog, someone asked me to post a photograph of my completed Mystery Crochet Pattern purse, so here it is!!!!

I REALLY LOVE THE WAY THIS TURNED OUT!!!

Saturday, April 2, 2011

Amigurumi Love

I've been wanting to try my hand at amigurumi for a while now. This is the Japanese crochet technique of making stuffed dolls and animals using single crochet, very tight, using a circular, spiral pattern to create the head, body and arms of your project. Stuffing is done as you create your animal with standard polyester fill.

I planned to make my granddaughter a crochet animal for her 2nd birthday this month, so I bought a Pound of Caron yarn in a light brown color and small amounts of red and bone colored Caron's Simply Soft. Using an amigurumi monkey pattern, I made the usual changes (I can't crochet without changing some part of the pattern) and created a Sock Monkey!


Sock Monkey on Laptop and Quilt Rack

I think he turned out great! The original pattern called for the bone color for the entire muzzle and the nostrils and  mouth were to be embroidered on. The body was entirely to be done in the brown. For a true sock monkey, the mouth was to be red and the little bottom was also to be red (for the original work socks had red toes and red heels). So I took the small amount of red and crocheted the red mouth on the muzzle and worked out the placement of red for his little bottom!

I think this was completely successful!

BUT IT DOESN'T STOP THERE!

Before I started the monkey, I tried my hand at the technique of holding 2 strands of yarn together to obtain interesting colors or textures. My friend, Sue, who donates yarn to me for my cancer hat project, provided 2 nice spring colors of Caron's Simpy Soft, a soft yellow and sage. I began making a hat with these two colors together, but soon found the stitches to be thicker and stiffer. So I made the circle for the crown of the hat a little larger to accommodate the stiffer stitching. Wouldn't you know, after I began creating the sides, I realized that the hat was waaaaaayyyyyyy too big. I took it to my friend Sue to get her opinion and yes, it was too big. But, as I held it with the top in the palm of my hand, Sue exclaimed that the piece would make a great bowl. So instead of tearing the previous rows out to make it smaller, I just continued until it was a nice little bowl. Then to make it more spring-like, I added a crocheted daffodil!


Now the amigurumi part . . .

Since no one would supply Easter candy for my bowl (this is our Spring piece at my job), I decided to see if I could find a pattern for Easter eggs.

Wouldn't you know it, my favorite yarn website (Lion Brand Yarn) had a great pattern for amigurumi eggs! My young friend from the nearby university gave me for my birthday some wonderful Red Heart yarn in a multi-color skein that just shouted out EASTER! So in between making the arms and legs of the sock monkey, I created little gems of Easter eggs!


I also took the opportunity to try my hand at spike stitches as you can see on the egg in the upper left!


The eggs looked a little lost in the bowl, so I created "grass" from green copy paper cut very thin on an office paper cutter.

I think the entire effect is wonderful!

What do you think?

Monday, March 7, 2011

Spring is Closing In!

This weekend I was busy with multiple crochet projects.

I decided to attempt a new technique of crocheting 2 strands of yarn together. You can choose 2 complimentary (or contrasting) colors or 2 different textures of yarn for entirely new looks. My friend Sue, who donates yarn to me for creating soft comfort hats for cancer patients, presented me with a skein of Simply Soft Sunshine and a skein of Simply Soft Soft Sage. I decided they were nice colors and decided to make a hat holding both yarns together. It was turning out beautifully, a nice thick double crochet post and the colors were really very nice. It also ended up a bit stiffer than I'm used to, so I increased the size to compensate for the lack of stretch. WELL . . .

The hat soon became too large. I was holding it up on my palm with the top down and the sides up explaining to Sue that I would have to pull out a few rows to shrink the size, when she pointed out that it looked like a pretty basket! I looked at it again and sure enough, it was a pretty Spring basket! So I thought, "what the heck!" we'll use it as a candy dish in our department.

Long story short, I continued for a few more rows, topped it off with a crab stitch row and made a pretty little crocheted daffodil for the front and here is my Spring basket!

This weekend was also a Women's Health Fair at our small local hospital. This being the first year for this event, I decided to bring a small skein of yarn to keep me busy while waiting for some of the free sessions that were offered. I had a small amount of pink / white yarn from my very first cancer hat, so I thought I'd try my hand at making a necklace choker. I knew I had a couple of loose pendants (without chains) that might work nicely as charms on the choker, so I quickly worked up rows of a single crochet / double crochet pattern that looks pretty and in less than an afternoon, I had this great necklace. My hubby helped me chose the charm and button for the clasp and I finished this up lickety split!

What do you think?