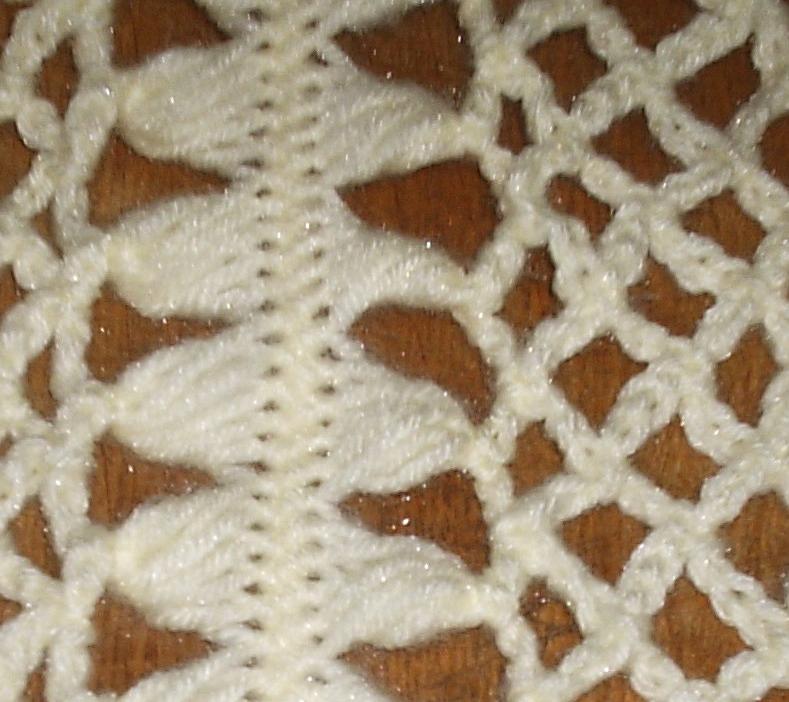
Okay, it may not be that dramatic, but today I was out in my driveway with my camera taking pollinator photos on my bee balm plants.
All of a sudden, someone walks up and says, "excuse me, but are you the woman who taught crochet at the library?"
I was taken aback and confused at first - crochet, library, was she talking about Elisabeth? But no, then I remembered the Beginning Crochet class I taught at the library eons ago.
"Yes, I taught beginning crochet."
First she thanked me. Then she proceeded to tell me how much it changed her. She kept crocheting after the one class and has made lots of afghans. Teenager's afghans, babies' afghans. She was embarrassed to tell me that she only learned one pattern and uses it all the time. I assured her that finding one pattern that makes her feel good is just fine. I guess a friend of hers has been more adventurous and crochets clothes, home décor, etc.
She thanked me again and then quietly walked away.
I have never had any positive feedback when I've tried to teach someone to crochet. I always put it down to the fact that I was taught to crochet by my mother, who was a knitter. I guess the way I hold my yarn and hook are more knitting techniques than crochet, but no matter. It gets the job done.
And someone thinks my teaching was perfectly fine. She is enjoying her newfound hobby and her loved ones are benefiting from her talents.
Well done, I say!
As for the photographs?
I hope to present projects, tips / tricks and general knowledge on the art of crochet. Be prepared for humor, education and hopefully inspiration!
Friday, July 3, 2020
Monday, June 26, 2017
The Good, the Bad and the Ugly, Part Deux
Okay, so I'm being a little facetious here.
My recovery from the accident has been slow but sure. The worst residual affect is the frequent numbness that happens to my right (dominant) hand. That was the hand that had the fractured bone, actually.
So, I'm back to work and hating every minute of it. But I am not going to go into anything about my employment / employer. This is not the time nor is it the venue. All I can say is that, for me, it is time to move on.
In some ways, I have begun to move on. I finally opened my Etsy store with a new name (you can change that only once, then you need to submit a request) and a new focus - thus Elegant Knots was born. After struggling trying to crochet pop can tab wrist cuffs, I gave up in frustration and let my first store die in obscurity. But part of my rehabilitation (self prescribed, I admit) was crocheting cowls and infinity scarves. There are only so many (and I have TOO many) infinity scarves / cowls a person can have, so what to do with the growing number of intricate and lacy pieces I was producing? Okay, I admit that I planned to sell many of these before I began the special designs I created. And here is my unique take on selling crochet: my pieces are one-of-a-kind piece of art! Yes, I said ART!
Right now I could go over to my inventory and my mouth will drop open at some of the intricate designs I have been creating. I try to marry a design with the yarn, be it the fiber content, the weight or the color, everything is taken into consideration before I pick up my hook. Oftentimes, I've already named the creation, such as Rose Garden Promise which, I admit, is one that always leaves me amazed.
So I have opened my store, though I haven't done very much promoting (just an announcement to my friends via FB). Of course, you don't make sales if no one visits. But I'm ready to update my current listings (which are more cooler weather offerings) with some fun summer scarfs (lighter weight). Then I feel I can start self-promoting more.
Plus, I will begin to showcase each offering on my store, here on my blog, by giving a more in-depth study of each piece as it relates from inception to completed piece of clothing. I hope you find the upcoming posts interesting.
My recovery from the accident has been slow but sure. The worst residual affect is the frequent numbness that happens to my right (dominant) hand. That was the hand that had the fractured bone, actually.
So, I'm back to work and hating every minute of it. But I am not going to go into anything about my employment / employer. This is not the time nor is it the venue. All I can say is that, for me, it is time to move on.
In some ways, I have begun to move on. I finally opened my Etsy store with a new name (you can change that only once, then you need to submit a request) and a new focus - thus Elegant Knots was born. After struggling trying to crochet pop can tab wrist cuffs, I gave up in frustration and let my first store die in obscurity. But part of my rehabilitation (self prescribed, I admit) was crocheting cowls and infinity scarves. There are only so many (and I have TOO many) infinity scarves / cowls a person can have, so what to do with the growing number of intricate and lacy pieces I was producing? Okay, I admit that I planned to sell many of these before I began the special designs I created. And here is my unique take on selling crochet: my pieces are one-of-a-kind piece of art! Yes, I said ART!
Right now I could go over to my inventory and my mouth will drop open at some of the intricate designs I have been creating. I try to marry a design with the yarn, be it the fiber content, the weight or the color, everything is taken into consideration before I pick up my hook. Oftentimes, I've already named the creation, such as Rose Garden Promise which, I admit, is one that always leaves me amazed.
So I have opened my store, though I haven't done very much promoting (just an announcement to my friends via FB). Of course, you don't make sales if no one visits. But I'm ready to update my current listings (which are more cooler weather offerings) with some fun summer scarfs (lighter weight). Then I feel I can start self-promoting more.
Plus, I will begin to showcase each offering on my store, here on my blog, by giving a more in-depth study of each piece as it relates from inception to completed piece of clothing. I hope you find the upcoming posts interesting.
Monday, March 20, 2017
The Good, The Bad and the Ugly
I know, everyone uses this cliché, but for me it describes the last three years (or 2 years and 3 months so far).
In 2015, my longtime supervisor and sometime friend moved to another department in my company and I was in charge of my destiny for pretty much the rest of the year. I developed working plans, tweaked normal tasks to peak efficiency and was humming along absolutely loving my job and my department. At the end of 2015, however, I was informed that the director wanted to add another person to our team who would also be our supervisor (my team consisted of myself and my co-worker, both in the digital side of marketing). We were assured that we would be in on the hiring process from day one. Of course I should have known. My company always talks a good talk to the employees, but when it comes down to it, everything is decided in the managers' favor. Due to everyone's schedule, the new guy was never introduced, much less interviewed by either my teammate or myself.
So in May of 2016, a new employee started who was to be my supervisor. Needless to say, we don't get along! My peak efficiency went out the window with his micromanaging my job. To say, 2016 was stressful and left me hating my job with a passion is a massive understatement.
I had had enough and told the director of my department as well as the director of HR. Another department in my company had been courting me for a new position and I was anxious to make the lateral move. But I discovered that my director didn't want to give me up just yet. She felt that there was no way that they would ever be able to replace me and she needed time to think about it. EVEN AFTER I TOLD HER THAT I WANTED OUT!!!
Unfortunately, this has happened in previous positions and I have ended up walking out. My parting line is usually, "I'm too valuable to allow a transfer, huh? Now you and the company have lost my expertise entirely!"
But this time I couldn't. I am the sole bread winner and we are keeping our 125 year house by the skin of our teeth. I can't afford to walk out. The stress has been nearly over the top, bringing on panic attacks and health issues.
So there's the Good: 2015; the Bad 2016; and the Ugly???
Date: January 27th, 2017
Time: 7:20 am
Place: Intersection of Galena Road and Rock Creek Road
I T-boned a car going 55-60 mph who turned at the last minute in front of me. I was driving a 25 year old Honda Civic with one airbag (drivers) which I was unsure would inflate or if it did, that it would explode. I knew I was going to die in that split second moment when I saw him turn in front of me.
When I opened my eyes, I couldn't breathe. I was conscious but I couldn't breathe. Oh great, my next thought was that now I'm going to die, but I'm going to be awake through the whole agonizing process of suffocation!
Then I realized that the car was filled with residual gas from the deployed airbag (which miraculously worked and saved my life). I forced myself to hiccup as I gingerly opened my driver's window. The cold clear air helped me to pull oxygen into my lungs and the gases dissipated. I was alive, but in terrible pain.
I won't go into any further details of my injuries / recovery, but I have been out of work since then with the doctor's saying mid-May. I'm hoping for the end of April (because of our finances).
So, my department has had to learn to get along without me. Have they learned that I'm certainly dispensable and allow me to apply for other job? Or will I have to start my new life with a new career.
Facing death, I have decided that I am too old and have been in the workforce too long to stay in a position that is slowly killing me. One way or the other, I'm beginning a new life now and it is up to me whether I spend it happily or a slave to the regularity of my old life.
Stay tuned . . .
In 2015, my longtime supervisor and sometime friend moved to another department in my company and I was in charge of my destiny for pretty much the rest of the year. I developed working plans, tweaked normal tasks to peak efficiency and was humming along absolutely loving my job and my department. At the end of 2015, however, I was informed that the director wanted to add another person to our team who would also be our supervisor (my team consisted of myself and my co-worker, both in the digital side of marketing). We were assured that we would be in on the hiring process from day one. Of course I should have known. My company always talks a good talk to the employees, but when it comes down to it, everything is decided in the managers' favor. Due to everyone's schedule, the new guy was never introduced, much less interviewed by either my teammate or myself.
So in May of 2016, a new employee started who was to be my supervisor. Needless to say, we don't get along! My peak efficiency went out the window with his micromanaging my job. To say, 2016 was stressful and left me hating my job with a passion is a massive understatement.
I had had enough and told the director of my department as well as the director of HR. Another department in my company had been courting me for a new position and I was anxious to make the lateral move. But I discovered that my director didn't want to give me up just yet. She felt that there was no way that they would ever be able to replace me and she needed time to think about it. EVEN AFTER I TOLD HER THAT I WANTED OUT!!!
Unfortunately, this has happened in previous positions and I have ended up walking out. My parting line is usually, "I'm too valuable to allow a transfer, huh? Now you and the company have lost my expertise entirely!"
But this time I couldn't. I am the sole bread winner and we are keeping our 125 year house by the skin of our teeth. I can't afford to walk out. The stress has been nearly over the top, bringing on panic attacks and health issues.
So there's the Good: 2015; the Bad 2016; and the Ugly???
Date: January 27th, 2017
Time: 7:20 am
Place: Intersection of Galena Road and Rock Creek Road
I T-boned a car going 55-60 mph who turned at the last minute in front of me. I was driving a 25 year old Honda Civic with one airbag (drivers) which I was unsure would inflate or if it did, that it would explode. I knew I was going to die in that split second moment when I saw him turn in front of me.
When I opened my eyes, I couldn't breathe. I was conscious but I couldn't breathe. Oh great, my next thought was that now I'm going to die, but I'm going to be awake through the whole agonizing process of suffocation!
Then I realized that the car was filled with residual gas from the deployed airbag (which miraculously worked and saved my life). I forced myself to hiccup as I gingerly opened my driver's window. The cold clear air helped me to pull oxygen into my lungs and the gases dissipated. I was alive, but in terrible pain.
I won't go into any further details of my injuries / recovery, but I have been out of work since then with the doctor's saying mid-May. I'm hoping for the end of April (because of our finances).
So, my department has had to learn to get along without me. Have they learned that I'm certainly dispensable and allow me to apply for other job? Or will I have to start my new life with a new career.
Facing death, I have decided that I am too old and have been in the workforce too long to stay in a position that is slowly killing me. One way or the other, I'm beginning a new life now and it is up to me whether I spend it happily or a slave to the regularity of my old life.
Stay tuned . . .
Sunday, February 16, 2014
Anatomy of a Crochet Pattern
Have you ever had a pattern for a crochet project that just seemed to be written in an alien language? Oh, it's in English and it uses perfectly acceptable crochet terms, but try as you might, it makes absolutely no sense? Sometimes I give up in frustration and decide to find something else to make. Sometimes the pattern is so intriguing that I REFUSE to give in to confusing instructions. I will follow the pattern exactly one, two, three (and this particular pattern) up to six times! If I can't dissect the stitch instructions into a visual representation of yarn and hook, then I will try to recreate the pattern with my own ideas.
In this case, neither 4 attempts of the original instructions, 2 of my own attempts and a final 2 attempts at the original instructions happened before the light came on and I realized what the crochet stitches were recreating! I should say that when I was fighting to figure out the instructions, I used similar weight / texture yarn, but none of the 'purchased yarn' for the project I committed myself to.
The pattern is called the Victorian Step which creates a bargello pattern like the walls of a castle battlement and was designed by Laura Pavy exclusively for bobwilson123's blog viewers. This pattern is available as written instructions in a PDF file and as a tutorial on YouTube.
Believe me, I read the instructions -- many times.
I watched the video -- twice
-- and then again with yarn following along.
When the light finally came on, I was nearly ready to apologize profusely to my co-worker, who is the soon-to-be, first-time mother I confidently promised to make a baby blanket from this intriguing crochet pattern before her baby was born. Luckily, the decision to give up removed the blinders I was experiencing from the stress of fighting with the instructions. I suddenly could see how the chains (ch) and double crochets (dc) created the 'merlons' and 'crenels' of the bargello pattern.
Merlons and crenels?
You must start with a chain. This pattern jumps right in to the highs and lows of crenellation. A foundation row won't work.
Now here's why: you will use 3 chs for the initial rise up the merlon, you will dc in the 2 following chains for the solid portion, and then you will use 3 ch to drop down the merlon and create the open space of the crenel.
Note: here is one of the areas that created confusion for me.
*Ch3, slst in next ch,skip 2 ch’s, dc in next 2ch’s, Skip 2ch’s, slst in next ch, ch3, dc in next 2ch’s Repeat from* to last ch, dc in last ch (last block is 3dc).
Once I realized what these combinations of chains, slipstitches and double crochets formed, it was easier to see how the following row which is repeated throughout the entire baby blanket, created the crenelations.
What is important now in the instructions, is to embrace the anatomy of the crenelation and how it is created using 2 ch, 2 dc, 2 ch for the merlon, and 2 dc for the crenel. The pattern states to use 3 ch, 2 dc, 3 ch, but I found that the merlon was too loose that way. The 2 ch, 2 dc technique creates a nice tight merlon. You will notice that the second 2 ch will slip stitch into the top of previous row's 2 ch, which is exactly the right height to start the 2 dc that will create the 'space' formed for the crenel. At the 2nd dc, you chain 2 which raises the row to the height of the merlon double crochets. (See image below.) The second ch 2 will drop down (slip stitch in top of previous row's 2 ch) to the height of the 2 dc crenels.
I use this visualization of the pattern and the anatomy of the stitches creating the pattern, to get comfortable with the project and then I can crochet away in confidence that the outcome will be exactly as it should.
So my advice is:
If you practice a little first following the instructions and see what the stitches are creating, then you will feel confident enough to take on the challenge of interesting patterns and textures, such as cables, popcorn stitch pictures, etc.
In this case, neither 4 attempts of the original instructions, 2 of my own attempts and a final 2 attempts at the original instructions happened before the light came on and I realized what the crochet stitches were recreating! I should say that when I was fighting to figure out the instructions, I used similar weight / texture yarn, but none of the 'purchased yarn' for the project I committed myself to.
The pattern is called the Victorian Step which creates a bargello pattern like the walls of a castle battlement and was designed by Laura Pavy exclusively for bobwilson123's blog viewers. This pattern is available as written instructions in a PDF file and as a tutorial on YouTube.
Believe me, I read the instructions -- many times.
I watched the video -- twice
-- and then again with yarn following along.
When the light finally came on, I was nearly ready to apologize profusely to my co-worker, who is the soon-to-be, first-time mother I confidently promised to make a baby blanket from this intriguing crochet pattern before her baby was born. Luckily, the decision to give up removed the blinders I was experiencing from the stress of fighting with the instructions. I suddenly could see how the chains (ch) and double crochets (dc) created the 'merlons' and 'crenels' of the bargello pattern.
Merlons and crenels?
A merlon forms the vertical solid parts of a battlement or crenelated parapet—in Medieval architecture of fortifications for millennia. Merlons are sometimes narrowly pierced by vertical embrasure "slits" to view and fire weapons through. When a wider space is between two merlons it is called a crenel, and a series of many merlon—crenels creates crenelation.So if this pattern intrigues you as it did me, here are my hints to help you figure out the instructions.
- From Wikipedia, the free encyclopedia
You must start with a chain. This pattern jumps right in to the highs and lows of crenellation. A foundation row won't work.
Now here's why: you will use 3 chs for the initial rise up the merlon, you will dc in the 2 following chains for the solid portion, and then you will use 3 ch to drop down the merlon and create the open space of the crenel.
Note: here is one of the areas that created confusion for me.
*Ch3, slst in next ch,skip 2 ch’s, dc in next 2ch’s, Skip 2ch’s, slst in next ch, ch3, dc in next 2ch’s Repeat from* to last ch, dc in last ch (last block is 3dc).
Once I realized what these combinations of chains, slipstitches and double crochets formed, it was easier to see how the following row which is repeated throughout the entire baby blanket, created the crenelations.
What is important now in the instructions, is to embrace the anatomy of the crenelation and how it is created using 2 ch, 2 dc, 2 ch for the merlon, and 2 dc for the crenel. The pattern states to use 3 ch, 2 dc, 3 ch, but I found that the merlon was too loose that way. The 2 ch, 2 dc technique creates a nice tight merlon. You will notice that the second 2 ch will slip stitch into the top of previous row's 2 ch, which is exactly the right height to start the 2 dc that will create the 'space' formed for the crenel. At the 2nd dc, you chain 2 which raises the row to the height of the merlon double crochets. (See image below.) The second ch 2 will drop down (slip stitch in top of previous row's 2 ch) to the height of the 2 dc crenels.
I use this visualization of the pattern and the anatomy of the stitches creating the pattern, to get comfortable with the project and then I can crochet away in confidence that the outcome will be exactly as it should.
So my advice is:
Hang in there when you are trying a new look or texture in crochet.
If you practice a little first following the instructions and see what the stitches are creating, then you will feel confident enough to take on the challenge of interesting patterns and textures, such as cables, popcorn stitch pictures, etc.
![]() |
| Entrelac using Tunisian Simple Stitches |
![]() |
| Fisherman's Sweater Pattern |
Sunday, April 21, 2013
PI -- A Hat-Maker's Friend!
Π or Pi is a mathematical number that corresponds between diameter and circumference. This is important when creating a hat. If you know a few crochet basics to make a circle, then you really don't need a pattern for your very own hat.
The first important thing to know is the 'Magic Ring' or Adjustable Ring. This creates a wonderful closed circle of stitches and is the perfect base to build your crown. Crochet Me has a great photo tutorial of this stitch and it doesn't take much practice to get it down. Once you have this technique down, creating a perfect circle is just a matter of a simple mathematical formula.
I usually create my hats with a base of single crochet stitches. So I create a 'Magic Ring' and make 6 sc in the ring and then pull it almost tight. I mark the first sc in each round and then work in a spiral. After a few rounds, I will then pull the ring tight.
The second round starts the increases that make your circle larger. In Round 2 you place 2 sc in each sc for a total of 12. Now the math comes in.
For the succeeding rounds, you increase the stitches in the following way:
Round 3: 1 sc in next stitch, 2 sc in next stitch, 1 sc in next stitch, 2 sc in next stitch . . . well, you should get the idea. This row will give you 18 stitches.
Round 4: 1 sc in next 2 stitches, 2 sc in next stitch, 1 sc in next 2 stitches, 2 sc in next stitch, and so on to get 24 stitches.
Round 5: 1 sc in next 3 stitches, 2 sc in next stitch, 1 sc in next 3 stitches, 2 sc in next stitch . . .
As you can see, you are adding a stitch between each increase in each succeeding row. If you look carefully at the completed rows, you can also see that you are adding the additional sc in the first stitch of the increase of your previous row and adding your increase (2 sc) in the second stitch of the increase of the previous row. Being able to recognize the patterns created by your stitches will help you keep the increases in a consistent manner and reduces the anxiety if you lose count.
The next important technique is measuring. If you have a tape measure, you are not tied down to gauge. And this is also where Π comes in.
First, measure around your head -- this is the circumference. Unless you can manipulate your measuring tape around the crocheted circle, finding out if you've made the crown large enough requires some math. Here's how you do it:
First lay your circle on a flat surface and measure across it at the widest point. For those of you who remember your Geometry, this is the diameter. Now, multiply that number, say it's 6.5 , by 3.1415 ( Π ). This will give you a circumference of a little under 20½". By the same token, if you measure your head and come up with 21" and divide by Π, you will see you need closer to 7" across your circle. Amazing!
Once you have the correct size of the crown (or circumference of your head), then you can stop increasing and just continue your rows until you are comfortable with the height or length of your hat. At this point, I often start a pattern, such as crocodile stitches or perhaps a post basket weave.
In this hat, which looks like a type of weave, the pattern is created with a sc / ch combination. Since this doesn't affect the tension (say like a post created basketweave or cables), you can begin using this stitch after creating your base row of stitches in the magic ring. Yes, you do your increases exactly the same. In each successive row, you place your sc in the chain space of the previous row and then chain 1, sc in the next chain space, well, you get the idea. When it comes to the increase, you just sc, chain 1 twice in the appropriate chain space.
I hope I've taken away the fear of making hats, and have encouraged your to dust off your math skills.
With this simple formula for increases and measuring, you should be able to whip out hats in no time. You may even create your own looks by adding different stitch combinations as you create the sides of your hat. In fact, if you get confident enough, you may even become a bonafide crochet hat designer!!!
The first important thing to know is the 'Magic Ring' or Adjustable Ring. This creates a wonderful closed circle of stitches and is the perfect base to build your crown. Crochet Me has a great photo tutorial of this stitch and it doesn't take much practice to get it down. Once you have this technique down, creating a perfect circle is just a matter of a simple mathematical formula.
I usually create my hats with a base of single crochet stitches. So I create a 'Magic Ring' and make 6 sc in the ring and then pull it almost tight. I mark the first sc in each round and then work in a spiral. After a few rounds, I will then pull the ring tight.
The second round starts the increases that make your circle larger. In Round 2 you place 2 sc in each sc for a total of 12. Now the math comes in.
For the succeeding rounds, you increase the stitches in the following way:
Round 3: 1 sc in next stitch, 2 sc in next stitch, 1 sc in next stitch, 2 sc in next stitch . . . well, you should get the idea. This row will give you 18 stitches.
Round 4: 1 sc in next 2 stitches, 2 sc in next stitch, 1 sc in next 2 stitches, 2 sc in next stitch, and so on to get 24 stitches.
Round 5: 1 sc in next 3 stitches, 2 sc in next stitch, 1 sc in next 3 stitches, 2 sc in next stitch . . .
As you can see, you are adding a stitch between each increase in each succeeding row. If you look carefully at the completed rows, you can also see that you are adding the additional sc in the first stitch of the increase of your previous row and adding your increase (2 sc) in the second stitch of the increase of the previous row. Being able to recognize the patterns created by your stitches will help you keep the increases in a consistent manner and reduces the anxiety if you lose count.
The next important technique is measuring. If you have a tape measure, you are not tied down to gauge. And this is also where Π comes in.
First, measure around your head -- this is the circumference. Unless you can manipulate your measuring tape around the crocheted circle, finding out if you've made the crown large enough requires some math. Here's how you do it:
First lay your circle on a flat surface and measure across it at the widest point. For those of you who remember your Geometry, this is the diameter. Now, multiply that number, say it's 6.5 , by 3.1415 ( Π ). This will give you a circumference of a little under 20½". By the same token, if you measure your head and come up with 21" and divide by Π, you will see you need closer to 7" across your circle. Amazing!
Once you have the correct size of the crown (or circumference of your head), then you can stop increasing and just continue your rows until you are comfortable with the height or length of your hat. At this point, I often start a pattern, such as crocodile stitches or perhaps a post basket weave.
In this hat, which looks like a type of weave, the pattern is created with a sc / ch combination. Since this doesn't affect the tension (say like a post created basketweave or cables), you can begin using this stitch after creating your base row of stitches in the magic ring. Yes, you do your increases exactly the same. In each successive row, you place your sc in the chain space of the previous row and then chain 1, sc in the next chain space, well, you get the idea. When it comes to the increase, you just sc, chain 1 twice in the appropriate chain space.I hope I've taken away the fear of making hats, and have encouraged your to dust off your math skills.
With this simple formula for increases and measuring, you should be able to whip out hats in no time. You may even create your own looks by adding different stitch combinations as you create the sides of your hat. In fact, if you get confident enough, you may even become a bonafide crochet hat designer!!!
Saturday, September 1, 2012
Lacy Hooded Cowl Pattern
I've had numerous requests for the pattern for my Lacy Hooded Cowl that I created for my co-worker, Alice's wedding gift. So here you are!
Lacy Hooded Cowl
By Celeste Dunn
Celestial Designs
Crochet Designs by Celeste
I created the cowl in a half double crochet openwork (one row of half double crochets, one row of half double, chain one, skip next stitch, half double across, then a row of half double crochets again). I created a rectangle 46" long by 20" wide, starting with a foundation half double crochet row (160 stitches), using a size "J" hook. Joining the 2 narrow sides, I created the cowl which hangs nicely down the front. The 20" width allows the lacy cowl to be drawn up as a delicate head covering, yet leave a nice collar on the back of the neck.
2 skeins #2 Fine Lace Yarn - I used Patons Lace (3 oz. / 498 yds) in the colorway of Midas.
Hook size: J
1 tapestry hook (for weaving in ends)
Special Note:
This pattern calls for a foundation chain of hdc. To FHDC, begin by chaining 3, yarn over and insert hook in first chain. Yarn over and draw through. Yarn over and draw through 1 loop (this is the next chain). Yarn over and draw through all 3 loops on hook. Yarn over, insert hook through chain just created. Yarn over and draw through, yarn over and draw through one loop (next chain). Yarn over and draw through 3 remaining loops. (This will now count as the second stitch). Continue across until you reach the correct number of foundation stitches.
Pattern
Row 1: FHDC 160 stitches. Turn. (Approximately 46" long)
Row 2: Chain 3 (counts as first HDC and one chain). HDC in 3rd stitch from end. *Chain 1, skip next stitch, HDC in next stitch. Repeat from * to end of row. Turn.
Row 3: Chain 2 (counts as first HDC). *HDC in chain 1 space. HDC in next stitch. HDC in next ch 1 space. Continue to end of row ending with HDC in last HDC stitch, HDC in ch 3 space, HDC in 2nd ch from end. Turn.
Repeat Rows 2 and 3 until piece measures 20". Fasten off, but do not cut yarn. Fold cowl in half crosswise, hold open ends togeter. With yarn and working through both sides to join, hdc in stitch row ends. Chain 1 over the chain space ends. HDC in stitch row end. Chain 1 over chain space ends. HDC in stitch row end. Continue to complete the join and fasten off. Weave ends in.
I plan on another one in Porcelain (which is a self-striping blue lace yarn).
Lacy Hooded Cowl
By Celeste Dunn
Celestial Designs
Crochet Designs by Celeste
I created the cowl in a half double crochet openwork (one row of half double crochets, one row of half double, chain one, skip next stitch, half double across, then a row of half double crochets again). I created a rectangle 46" long by 20" wide, starting with a foundation half double crochet row (160 stitches), using a size "J" hook. Joining the 2 narrow sides, I created the cowl which hangs nicely down the front. The 20" width allows the lacy cowl to be drawn up as a delicate head covering, yet leave a nice collar on the back of the neck.
2 skeins #2 Fine Lace Yarn - I used Patons Lace (3 oz. / 498 yds) in the colorway of Midas.
Hook size: J
1 tapestry hook (for weaving in ends)
Special Note:
This pattern calls for a foundation chain of hdc. To FHDC, begin by chaining 3, yarn over and insert hook in first chain. Yarn over and draw through. Yarn over and draw through 1 loop (this is the next chain). Yarn over and draw through all 3 loops on hook. Yarn over, insert hook through chain just created. Yarn over and draw through, yarn over and draw through one loop (next chain). Yarn over and draw through 3 remaining loops. (This will now count as the second stitch). Continue across until you reach the correct number of foundation stitches.
Pattern
Row 1: FHDC 160 stitches. Turn. (Approximately 46" long)
Row 2: Chain 3 (counts as first HDC and one chain). HDC in 3rd stitch from end. *Chain 1, skip next stitch, HDC in next stitch. Repeat from * to end of row. Turn.
Row 3: Chain 2 (counts as first HDC). *HDC in chain 1 space. HDC in next stitch. HDC in next ch 1 space. Continue to end of row ending with HDC in last HDC stitch, HDC in ch 3 space, HDC in 2nd ch from end. Turn.
Repeat Rows 2 and 3 until piece measures 20". Fasten off, but do not cut yarn. Fold cowl in half crosswise, hold open ends togeter. With yarn and working through both sides to join, hdc in stitch row ends. Chain 1 over the chain space ends. HDC in stitch row end. Chain 1 over chain space ends. HDC in stitch row end. Continue to complete the join and fasten off. Weave ends in.
I plan on another one in Porcelain (which is a self-striping blue lace yarn).
Sunday, August 12, 2012
Lacy Hooded Cowl
Weddings! I seem to have jumped into the wedding vortex sometime between July and August.
One of my co-workers, Alice announced earlier this year that she will be marrying her American boyfriend in her native Germany (rumor has it a castle will be figuring into the wedding somehow) in early September.
Alice just loves my crochet and was one of the first people I actually made something for (a cancer hat for her mother). So, of course, I wanted to make an extra special gift for her wedding. She has a wonderful sense of fashion and accessorizes often with cowls and scarves. So the logical step was to make a lacy cowl. While the idea was percolating in my mind, I came across an Annie's crochet catalog and there, in the pattern section was a pretty hooded cowl. Now I honestly didn't want to purchase and have shipped a pattern -- especially since I didn't particularly like the stitch pattern used. But I really liked the look and drape of the cowl, so I made up my mind to create my own.
If you look in one of my previous posts, you will see a crocodile stitched shawl that I made my older sister. I used Patons Lace yarn which is acrylic/wool/mohair and has a nice halo effect. It is a mid-range priced yarn and I actually bought more than I needed, so I had 2 skeins left. The color is called Midas but is actually a self-striping yarn in white, beige, walnut, sage, deep purple colors. Perfect colors for Alice!
I created the cowl in a half double crochet openwork (one row of half double crochets, one row of half double, chain one, skip next stitch, half double across, then a row of half double crochets again). I created a rectangle 46" long by 20" wide, starting with a foundation half double crochet row (160 stitches), using a size "J" hook. Joining the 2 narrow sides, I created the cowl which hangs nicely down the front. The 20" width allows the lacy cowl to be drawn up as a delicate head covering, yet leave a nice collar on the back of the neck. I love the way it turned out. I think Alice will love it, too!
Then a couple of weeks ago, my youngest son and his fiancée announced that they're going to get married this fall -- at our house! OMG! Another wedding gift to prepare (and house to clean and yard to fix . . .)
I loved the look of this stitch pattern and the way it turned out with the Patons Lace, so I decided to make my daughter-in-law a shawl (she doesn't wear hats or cowls). As they are planning an Autumn wedding, complete with pumpkins, cornstalks and hay bales, I chose the Patons Lace Bonfire. But when I went to Joanns to purchase it, alas, they didn't carry this particular color. But what they did have was Patons Lace Sequins in black. PERFECT! My daughter-in-law just loves black! So I purchased 4 skeins and have started the shawl with a half double crochet grid pattern. So far it looks wonderful -- the sequins are very small, so the sparkle is subtle and quite charming. I think she will love this! More later . . .
One of my co-workers, Alice announced earlier this year that she will be marrying her American boyfriend in her native Germany (rumor has it a castle will be figuring into the wedding somehow) in early September.
Alice just loves my crochet and was one of the first people I actually made something for (a cancer hat for her mother). So, of course, I wanted to make an extra special gift for her wedding. She has a wonderful sense of fashion and accessorizes often with cowls and scarves. So the logical step was to make a lacy cowl. While the idea was percolating in my mind, I came across an Annie's crochet catalog and there, in the pattern section was a pretty hooded cowl. Now I honestly didn't want to purchase and have shipped a pattern -- especially since I didn't particularly like the stitch pattern used. But I really liked the look and drape of the cowl, so I made up my mind to create my own.
If you look in one of my previous posts, you will see a crocodile stitched shawl that I made my older sister. I used Patons Lace yarn which is acrylic/wool/mohair and has a nice halo effect. It is a mid-range priced yarn and I actually bought more than I needed, so I had 2 skeins left. The color is called Midas but is actually a self-striping yarn in white, beige, walnut, sage, deep purple colors. Perfect colors for Alice!
![]() |
| Lacy Cowl |
I created the cowl in a half double crochet openwork (one row of half double crochets, one row of half double, chain one, skip next stitch, half double across, then a row of half double crochets again). I created a rectangle 46" long by 20" wide, starting with a foundation half double crochet row (160 stitches), using a size "J" hook. Joining the 2 narrow sides, I created the cowl which hangs nicely down the front. The 20" width allows the lacy cowl to be drawn up as a delicate head covering, yet leave a nice collar on the back of the neck. I love the way it turned out. I think Alice will love it, too!
![]() |
| Delicate Lacy Hood |
![]() |
| Lacy Hood with Collar |
Then a couple of weeks ago, my youngest son and his fiancée announced that they're going to get married this fall -- at our house! OMG! Another wedding gift to prepare (and house to clean and yard to fix . . .)
I loved the look of this stitch pattern and the way it turned out with the Patons Lace, so I decided to make my daughter-in-law a shawl (she doesn't wear hats or cowls). As they are planning an Autumn wedding, complete with pumpkins, cornstalks and hay bales, I chose the Patons Lace Bonfire. But when I went to Joanns to purchase it, alas, they didn't carry this particular color. But what they did have was Patons Lace Sequins in black. PERFECT! My daughter-in-law just loves black! So I purchased 4 skeins and have started the shawl with a half double crochet grid pattern. So far it looks wonderful -- the sequins are very small, so the sparkle is subtle and quite charming. I think she will love this! More later . . .
Saturday, June 30, 2012
Amigurumi Love
This year I will have worked at the same company for 16 years, and what this means is that I've made my co-workers just about everything that I could think of that's easy, quick and everyone would like. So I was wracking my brain trying to figure out what I could crochet for birthdays this year. Then the answer came when I asked my co-worker / best friend Sue (who's birthday is early in the year) what she'd like this year.
I've got a reputation for my beautiful crochet work, so I felt comfortable asking for ideas. Surprisingly, she chose an amigurumi maneki neko (good fortune cat popular in Japan).
Last year, I had brought in the sock monkey I made my granddaughter and a lot people fell in love with the amigurumi concept. So I wasn't daunted, but a little surprised at her choice. But that didn't stop me from locating a free pattern online (My Maneki Neko by Kathy Wishnie of Belgrade, Montana - Mountain Weaver Fiber Art Studio blog) and after getting Sue's approval, set off to make a traditional maneki neko!
First I had to determine which paw should wave (it makes a difference in what you wish for). The right paw waving, summons good fortune. The left paw means wealth. She chose the right paw. That was the only 'customization' I allowed. Luckily, these little amigurumi don't take up much yarn, so I chose what I had in my stash.
I also find it extremely difficult to embroider faces on amigurumi, so was a little stressed when it came time to put this little guy together. Then I had an inspiration! Fabric pens!!!! I bought a set when I was quilting so that I could make quick labels on my creations. After studying the samples in the pattern, I chose this face and the rest was easy . . .
Of course, on Sue's birthday, everyone went crazy. I got three more orders (which is good because all 3 birthdays fall one right after the other.
First my boss wanted a magician's rabbit in the hat. (Inside joke about our recent web site project and the unorganized project management.) So I found Pull a Rabbit out of your Hat by Linda Green on Ravelry and whipped one up.
Since his birthday closely followed Sue's, I presented "Gompy" to him right away. As I often do, I made quite a few changes to this pattern. Instead of sewing the unstuffed head into the inside brim of the hat, I stuffed the head and sewed a crocheted base on it. then I attached a black yarn thread from the center top of the hat (on the bottom in the photo) and the center of the underside of the head (there's only a head in the hat). That way, the rabbit keeps its shape and the ears sit up beautifully. Also, over-enthusiastic admirers can't separate the bunny from the hat.
"Gompy" has turned into our department mascot. He has a prominent place in our work area. :)
Well, "Gompy" led to the next request from the department director. She lives with 2 floppy eared rabbits: grey and white and black and white. So I set about looking for the floppy eared amigurumi.
This is one reason why I just love Ravelry. They have such creative artists / designers and you can always find a pattern that just speaks to you. So it was with the Floppy Eared Easter Bunny by Jessica Legan. I showed it to Amy and she fell in love.
So here is what she received on her birthday! The grey bunny was the recipient of the fabric pen treatment, but I couldn't draw any color on the black bunny so I had to try my hand at embroidery on crochet. I used a pearly white embroidery floss and I'm not quite as happy with the affect as I am with the pen treatments.
Well, Amy's birthday is immediately followed by Alice's and she requested a monkey (she had fallen in love with the sock monkey last year).
So I once again went on the hunt and found Monkey with Banana by Betsi Brunson (again on Ravelry -- see what I mean?)
Isn't he ADORABLE?
Well, I've put aside my stuffed animal rush for the time being (the next birthday isn't until fall).
But that doesn't mean I don't have a dozen more projects planned and a few more in the works!
I've got a reputation for my beautiful crochet work, so I felt comfortable asking for ideas. Surprisingly, she chose an amigurumi maneki neko (good fortune cat popular in Japan).
Last year, I had brought in the sock monkey I made my granddaughter and a lot people fell in love with the amigurumi concept. So I wasn't daunted, but a little surprised at her choice. But that didn't stop me from locating a free pattern online (My Maneki Neko by Kathy Wishnie of Belgrade, Montana - Mountain Weaver Fiber Art Studio blog) and after getting Sue's approval, set off to make a traditional maneki neko!
First I had to determine which paw should wave (it makes a difference in what you wish for). The right paw waving, summons good fortune. The left paw means wealth. She chose the right paw. That was the only 'customization' I allowed. Luckily, these little amigurumi don't take up much yarn, so I chose what I had in my stash.
I also find it extremely difficult to embroider faces on amigurumi, so was a little stressed when it came time to put this little guy together. Then I had an inspiration! Fabric pens!!!! I bought a set when I was quilting so that I could make quick labels on my creations. After studying the samples in the pattern, I chose this face and the rest was easy . . .
Of course, on Sue's birthday, everyone went crazy. I got three more orders (which is good because all 3 birthdays fall one right after the other.
First my boss wanted a magician's rabbit in the hat. (Inside joke about our recent web site project and the unorganized project management.) So I found Pull a Rabbit out of your Hat by Linda Green on Ravelry and whipped one up.
Since his birthday closely followed Sue's, I presented "Gompy" to him right away. As I often do, I made quite a few changes to this pattern. Instead of sewing the unstuffed head into the inside brim of the hat, I stuffed the head and sewed a crocheted base on it. then I attached a black yarn thread from the center top of the hat (on the bottom in the photo) and the center of the underside of the head (there's only a head in the hat). That way, the rabbit keeps its shape and the ears sit up beautifully. Also, over-enthusiastic admirers can't separate the bunny from the hat.
"Gompy" has turned into our department mascot. He has a prominent place in our work area. :)
Well, "Gompy" led to the next request from the department director. She lives with 2 floppy eared rabbits: grey and white and black and white. So I set about looking for the floppy eared amigurumi.
This is one reason why I just love Ravelry. They have such creative artists / designers and you can always find a pattern that just speaks to you. So it was with the Floppy Eared Easter Bunny by Jessica Legan. I showed it to Amy and she fell in love.
So here is what she received on her birthday! The grey bunny was the recipient of the fabric pen treatment, but I couldn't draw any color on the black bunny so I had to try my hand at embroidery on crochet. I used a pearly white embroidery floss and I'm not quite as happy with the affect as I am with the pen treatments.
Well, Amy's birthday is immediately followed by Alice's and she requested a monkey (she had fallen in love with the sock monkey last year).
So I once again went on the hunt and found Monkey with Banana by Betsi Brunson (again on Ravelry -- see what I mean?)
Isn't he ADORABLE?
Well, I've put aside my stuffed animal rush for the time being (the next birthday isn't until fall).
But that doesn't mean I don't have a dozen more projects planned and a few more in the works!
Sunday, April 8, 2012
New Beginnings
This week, April 4th, my dearest husband and I became grandparents. My youngest son, Ben and his fiancé Ashly had a son, Owen Benjamin. As you can see, it was a very proud moment for my husband, Steve.
I wanted to make something special for my new grandson and the parents. I remembered seeing free patterns for a car seat blanket. This blanket has strategic holes for the straps and buckles and there were actually 3 different patterns for this project. After going through all three, I decided to take the plunge and re-try my hand at making granny squares.
You see, granny squares and I aren't very compatible with each other. My first major crochet project was a granny square afghan. It was absolutely gorgeous with a royal blue, light blue, green and yellow (at least I think it was green -- I know the center of each granny was yellow!) Anyways, I bought all of the yarn necessary (cost me a bunch of saved money from my chores) and got started. For some reason, squares just bore me to tears and if you're one stitch off, they get all wonky. I rapidly got frustrated and put the whole shabang away. I would take it out ever-so-often and make a couple of more squares, but there were so many to do . . .
My younger sister took the afghan in hand (spare yarn and all) and tried to take over and finish the project. I don't know how she ever did on it. Whether she finished or gave up as well.
But this project intrigued me. http://www.premieryarns.com/patterns.php?id=108
So I grabbed the royal blue yarn (Caron One Pound) I had bought for the blanket. I had some left-over rich chocolate brown (Caron One Pound) from making a hooded cocoon for the newborn. (Forgot to take photos of the finished project, darn! I'll have to hope I can get a photo from my son when they use it.) Anyways, I grabbed the 2 yarns and my crochet hook and attempted to make my first hexagon granny. The end product was so beautiful that I jumped in. What I absolutely love is that there are only 30 hexagons, 4 half-hexagons and 2 triangles to make. It doesn't seem like an impossible number to me -- and that's half the battle.
According to the blanket diagram, the 2 triangle pieces form the opening for the buckle, so I made enough hexagons and the 2 triangles and laid out the central part of the diagram.
I am so excited with this pattern so far -- I can't wait to finish all the hexagons.
I will post the completed blanket.
I wanted to make something special for my new grandson and the parents. I remembered seeing free patterns for a car seat blanket. This blanket has strategic holes for the straps and buckles and there were actually 3 different patterns for this project. After going through all three, I decided to take the plunge and re-try my hand at making granny squares.
You see, granny squares and I aren't very compatible with each other. My first major crochet project was a granny square afghan. It was absolutely gorgeous with a royal blue, light blue, green and yellow (at least I think it was green -- I know the center of each granny was yellow!) Anyways, I bought all of the yarn necessary (cost me a bunch of saved money from my chores) and got started. For some reason, squares just bore me to tears and if you're one stitch off, they get all wonky. I rapidly got frustrated and put the whole shabang away. I would take it out ever-so-often and make a couple of more squares, but there were so many to do . . .
My younger sister took the afghan in hand (spare yarn and all) and tried to take over and finish the project. I don't know how she ever did on it. Whether she finished or gave up as well.
But this project intrigued me. http://www.premieryarns.com/patterns.php?id=108
According to the blanket diagram, the 2 triangle pieces form the opening for the buckle, so I made enough hexagons and the 2 triangles and laid out the central part of the diagram.
I am so excited with this pattern so far -- I can't wait to finish all the hexagons.
I will post the completed blanket.
Saturday, March 3, 2012
Do I Really Have to Block?
Trust me, I asked this so often -- and most often told myself, no -- I really don't need to block this finished piece of crochet. And actually, I was wrong. Boy, was I wrong!
Sure, you can skip blocking for afghans and blankets, but blocking is an essential part of crochet, especially for clothing items and lace.
And to be honest, it wasn't the blocking per se that I objected to, it was the fact that I did not have any way to block. I live in a 110 year old farm house with hard wood floors. We live on an extremely tight budget and I couldn't justify the purchase of blocking paraphernalia that is available from craft / yarn / online stores. They were just too darned expensive. Sooooooo, I skipped the traditional forms of blocking and when a pattern really needed that extra step, I fudged. I would stretch and steam on an ironing board (which didn't lend itself very well to even blocking). Or I would enlist my 20-something son to grab an end while I gently pulled a damp piece to the best shape I could. (Sigh!)
But I've just completed a crocodile stitch shawl for my older sister's birthday and I must say, it really needed to be blocked. That is, dampened and pinned to a surface and allowed to air dry. How the heck could I do that?
Well, the answer came during a visit to Walmart in my weekly grocery shopping. They had a display of foam floor tiles for a workout room. You know the kind, they have the interlocking pieces, so you can snap a bunch together to make a large square or put a bunch in a row for a long mat. Best of all, they were almost half the cost of comparable foam pieces used for crafts. So today, I bit the bullet and bought a package of 6 tiles (under $20) and brought them home.
Here are 2 of the foam blocks snapped together. Luckily, the underside doesn't have any pattern to it, so I flipped them upside down to avoid leaving ridges.
Actually, it became a moot point since I decided to cover the mat (the foam smells AWFUL) with a gridded flannel fabric I've been hanging on to for years.
It will protect my crochet projects (who knows what these blocks are made of) and hopefully, will provide a barrier to the smell getting into the yarn.
So, I bought the foam pieces, snapped 4 of them together and put them on my cutting table, then wrapped the surface with the gridded flannel fabric, pinning the underside with safety pins.
Next, I took the shawl and a wash basin with cold water and Woolite. I gave the shawl a good soak, washed it a bit and then rolled it up in towels and squeezed as much water out as I could. Then it came time to try my new blocking setup.
It took some pinning, unpinning and repinning, but I finally got the piece stretched to the correct size and shape I was hoping for.
Let me explain briefly -- when I completed the crocheting, the shawl (which I call the Calico Crocodile for its lovely colors) was 60" wide and 22" long. This was a little disappointing as I was hoping for a nice wide triangle to cover the shoulders and a long drape in the back.
Well, after stretching and pinning, the finished shawl is now 70" wide and 32" long. After it is thoroughly dried, I will add 6" fringe along the sides. This should make the shawl an elegant addition to my sister's wardrobe. I am absolutely tickled with the way it is turning out.
In this photo, you can see the crocodile scales and the calico colors. As of this evening, the shawl is almost completely dry. In the morning, I will remove it from the blocking and add the fringe. Of course, I will then post the final image below.
Stay tuned . . .
. . . and here it is -- completed!
Sure, you can skip blocking for afghans and blankets, but blocking is an essential part of crochet, especially for clothing items and lace.
And to be honest, it wasn't the blocking per se that I objected to, it was the fact that I did not have any way to block. I live in a 110 year old farm house with hard wood floors. We live on an extremely tight budget and I couldn't justify the purchase of blocking paraphernalia that is available from craft / yarn / online stores. They were just too darned expensive. Sooooooo, I skipped the traditional forms of blocking and when a pattern really needed that extra step, I fudged. I would stretch and steam on an ironing board (which didn't lend itself very well to even blocking). Or I would enlist my 20-something son to grab an end while I gently pulled a damp piece to the best shape I could. (Sigh!)
But I've just completed a crocodile stitch shawl for my older sister's birthday and I must say, it really needed to be blocked. That is, dampened and pinned to a surface and allowed to air dry. How the heck could I do that?
Well, the answer came during a visit to Walmart in my weekly grocery shopping. They had a display of foam floor tiles for a workout room. You know the kind, they have the interlocking pieces, so you can snap a bunch together to make a large square or put a bunch in a row for a long mat. Best of all, they were almost half the cost of comparable foam pieces used for crafts. So today, I bit the bullet and bought a package of 6 tiles (under $20) and brought them home.
Here are 2 of the foam blocks snapped together. Luckily, the underside doesn't have any pattern to it, so I flipped them upside down to avoid leaving ridges.
Actually, it became a moot point since I decided to cover the mat (the foam smells AWFUL) with a gridded flannel fabric I've been hanging on to for years.
It will protect my crochet projects (who knows what these blocks are made of) and hopefully, will provide a barrier to the smell getting into the yarn.
So, I bought the foam pieces, snapped 4 of them together and put them on my cutting table, then wrapped the surface with the gridded flannel fabric, pinning the underside with safety pins.
Next, I took the shawl and a wash basin with cold water and Woolite. I gave the shawl a good soak, washed it a bit and then rolled it up in towels and squeezed as much water out as I could. Then it came time to try my new blocking setup.
It took some pinning, unpinning and repinning, but I finally got the piece stretched to the correct size and shape I was hoping for.
Let me explain briefly -- when I completed the crocheting, the shawl (which I call the Calico Crocodile for its lovely colors) was 60" wide and 22" long. This was a little disappointing as I was hoping for a nice wide triangle to cover the shoulders and a long drape in the back.
Well, after stretching and pinning, the finished shawl is now 70" wide and 32" long. After it is thoroughly dried, I will add 6" fringe along the sides. This should make the shawl an elegant addition to my sister's wardrobe. I am absolutely tickled with the way it is turning out.
In this photo, you can see the crocodile scales and the calico colors. As of this evening, the shawl is almost completely dry. In the morning, I will remove it from the blocking and add the fringe. Of course, I will then post the final image below.
Stay tuned . . .
. . . and here it is -- completed!
Friday, March 2, 2012
Shamrock Bunting
For 36" bunting
Chain 121.
Using stitch markers, mark every 15 chains from beginning. These will be
the chains where you will attach the shamrocks.
Now, at the second chain from your hook, sc
through each chain to the first marker. Insert hook into the marked
chain and then through the stitch at the top of a completed shamrock, yarn over, then pull through both the stitch on the shamrock and the chain, then slip stitch. Sc through the next chain and in each chain to the next
marker. Again, insert hook through the marked chain, then through the
stitch at the top of another completed shamrock, yarn over, pull through and slip stitch.
Continue to the end, attaching shamrocks with slip stitches and sc in
each chain between. Fasten off and weave ends in.
Sunday, February 19, 2012
Making Time to Crochet
It's hard to always make time to crochet. I work full-time and care for a disabled husband. For a while there, I was almost obsessive about my craft time. For nearly 2 years I was crocheting every spare minute -- turning out hats (which were donated to cancer patients), gifts, items of clothing for myself, even purses!
But as always happens, I've hit a slump. I'm working on a gift, so I can't just ease up and let the inspiration return. In fact, after I finish this gift, I must start another right away for the upcoming birth of my first grandchild. How do I keep going? As much as I hate to admit it, I just have to force myself to set aside the hours and plug away.
But I have to admit, this slump may not be long lived. I absolutely love the way The Calico Crocodile shawl is shaping up. It's just beautiful as you can see.
Here is a close-up of the actual stitch pattern. It looks hard, and takes some getting used to, but the end result is always stunning.
I just started the third skein and will use that one completely -- I think the shawl will be the right size at that point. Then, as a final touch, the pattern calls for fringe and I intend to try to match the fringe to the stripes.
I think my sister will just love this shawl!
But as always happens, I've hit a slump. I'm working on a gift, so I can't just ease up and let the inspiration return. In fact, after I finish this gift, I must start another right away for the upcoming birth of my first grandchild. How do I keep going? As much as I hate to admit it, I just have to force myself to set aside the hours and plug away.
I just started the third skein and will use that one completely -- I think the shawl will be the right size at that point. Then, as a final touch, the pattern calls for fringe and I intend to try to match the fringe to the stripes.
I think my sister will just love this shawl!
Tuesday, January 24, 2012
Too Tense or not Too Tense
Well, I've learned a valuable lesson with my latest project. I am crocheting a triangle shawl as a gift, using the crocodile stitch. I just love this stitch and the whole look of the thing.
In fact, I've made a bunch of hats with this stitch for my charitable work.
Anyways, I started this shawl, using an acrylic, wool, mohair blend yarn and was progressing along with the first skein when I noticed that the shawl was very small -- it looked like I would need a lot more yarn than I originally purchased and it was rather expensive. Since we are on a very tight budget, I knew that I couldn't buy any more, so with the second skein, I began loosening my tension.
Now, I've watched the "speed crocheters" on You Tube and even my 26 year old son crochets fast and rather loosely. So I asked him how he does it and after he explained, I began my 'loose' experimentation with the crocodile stitches.What an amazing difference!!! The shawl took on a beautiful lacey look. Not only that, but it was draping better and looking more like the pattern photos. I finished the 2nd skein and was progressing into the third when I suddenly realized -- the shawl looked WONKY!
The early tight rows bowed inward, while the later looser rows created a nice straight edge. I tried to stretch the lower rows -- no good. I tried to ignore it -- everyone else didn't seem to notice (in fact, I have been receiving rave reviews on this shawl). But I DID!
I pride myself on my beautiful stitch work and the professional look of my projects and this was just plain wonky.
So, over the weekend, I decided enough was enough. I began to rip out the shawl to the very beginning and start again.
Let me tell you, frogging out mohair yarn is not easy. It's not a matter of pulling the yarn and the work unravels. The halo strands of mohair tangle and tighten and all around drive one crazy, but I succeeded in stripping the shawl down to the first skein. I've stopped at this point and took one of the frogged skeins to begin again with my new loose technique. I am quite, quite pleased.
The piece on the top is the original and the darker piece on the bottom is my reboot with looser stitches -- what do you think?
Now, you may say, what about gauge? Didn't you test your gauge first? I know, I know -- all professional crocheters tell you that gauge is essential. I just HATE it. Besides, this pattern was open ended when it came to gauge. Since it is a triangle shawl that begins at the point and increases, the idea is to just keep adding rows until you get the size you want. Besides, no matter what I used to do, I could never quite reach the correct gauge. Now I know why -- my tension, though consistent throughout a project -- is just too tight to be adjusted by one hook size or sometimes even two hook sizes.
So the moral of the story here, dear friends, is to keep the loose tension from now on.
Besides, I'm actually becoming one of the speed crocheters now, too! :)
In fact, I've made a bunch of hats with this stitch for my charitable work.
Anyways, I started this shawl, using an acrylic, wool, mohair blend yarn and was progressing along with the first skein when I noticed that the shawl was very small -- it looked like I would need a lot more yarn than I originally purchased and it was rather expensive. Since we are on a very tight budget, I knew that I couldn't buy any more, so with the second skein, I began loosening my tension.
Now, I've watched the "speed crocheters" on You Tube and even my 26 year old son crochets fast and rather loosely. So I asked him how he does it and after he explained, I began my 'loose' experimentation with the crocodile stitches.What an amazing difference!!! The shawl took on a beautiful lacey look. Not only that, but it was draping better and looking more like the pattern photos. I finished the 2nd skein and was progressing into the third when I suddenly realized -- the shawl looked WONKY!
The early tight rows bowed inward, while the later looser rows created a nice straight edge. I tried to stretch the lower rows -- no good. I tried to ignore it -- everyone else didn't seem to notice (in fact, I have been receiving rave reviews on this shawl). But I DID!
I pride myself on my beautiful stitch work and the professional look of my projects and this was just plain wonky.
So, over the weekend, I decided enough was enough. I began to rip out the shawl to the very beginning and start again.
Let me tell you, frogging out mohair yarn is not easy. It's not a matter of pulling the yarn and the work unravels. The halo strands of mohair tangle and tighten and all around drive one crazy, but I succeeded in stripping the shawl down to the first skein. I've stopped at this point and took one of the frogged skeins to begin again with my new loose technique. I am quite, quite pleased.
The piece on the top is the original and the darker piece on the bottom is my reboot with looser stitches -- what do you think?
Now, you may say, what about gauge? Didn't you test your gauge first? I know, I know -- all professional crocheters tell you that gauge is essential. I just HATE it. Besides, this pattern was open ended when it came to gauge. Since it is a triangle shawl that begins at the point and increases, the idea is to just keep adding rows until you get the size you want. Besides, no matter what I used to do, I could never quite reach the correct gauge. Now I know why -- my tension, though consistent throughout a project -- is just too tight to be adjusted by one hook size or sometimes even two hook sizes.
So the moral of the story here, dear friends, is to keep the loose tension from now on.
Besides, I'm actually becoming one of the speed crocheters now, too! :)
Thursday, August 25, 2011
Stone Path Hat
I feel bad that I haven't posted in a while -- only to post about a major loss in my life.
So to balance the sad with the good, I want to share one of my biggest crochet triumphs -- The Stone Path Hat.
As you can see, this hat pattern revives the knit Aran Sweater pattern of lines, wide cables, tight cables and popcorns. It is a true wonder of mathematical precision, designed by Lisa Naskrent. I obtained the pattern from a free e-book of crocheted hats through CrochetMe.com.
I did find, however, that the hat ends up too small, even when the gauge works out right.
Then again, I used regular worsted weight yarn (Caron's Simply Soft) and, I believe, a size "H" hook (unfortunately, I didn't write down the hook size on this first attempt) where the pattern called for sport weight and a size "E" hook. This hat will fit a small adult or pre-teen.
I made a second attempt, with mint green sport yarn and a size "J" hook. I also followed the pattern for the largest size and am extremely pleased with this second hat. It ended up just a tad large, but since this will be donated in my cancer hat project, a little large is good. I also finished it off with a slightly different edge -- forgoing the roll up brim.
This was a case of where I began with the written instructions. Unlike most patterns, I had to carefully mark off each pattern repeat and it took great concentration to make sure that I maintained the increases correctly. It was very important when I finally began the body of the hat and got into the full-fledged cables and twists and popcorns. At that point, I switched to the crochet symbol diagram as it gave me a clear impression of what each row looked like and how they interacted as a whole.
When making the mint green version, I discovered a great tip (darn! can't remember where now) that said to take recipe cards and transfer the symbol crochet pattern, one row to one card through one pattern repeat. WOW! What a great idea! I did exactly that. I recreated the symbols, line by line on 6 cards (6 rows make one full pattern). These were easier to carry and I never lost my place in the pattern. It made making the second hat a breeze!
What do you think?
So to balance the sad with the good, I want to share one of my biggest crochet triumphs -- The Stone Path Hat.
As you can see, this hat pattern revives the knit Aran Sweater pattern of lines, wide cables, tight cables and popcorns. It is a true wonder of mathematical precision, designed by Lisa Naskrent. I obtained the pattern from a free e-book of crocheted hats through CrochetMe.com.
I did find, however, that the hat ends up too small, even when the gauge works out right.
Then again, I used regular worsted weight yarn (Caron's Simply Soft) and, I believe, a size "H" hook (unfortunately, I didn't write down the hook size on this first attempt) where the pattern called for sport weight and a size "E" hook. This hat will fit a small adult or pre-teen.
I made a second attempt, with mint green sport yarn and a size "J" hook. I also followed the pattern for the largest size and am extremely pleased with this second hat. It ended up just a tad large, but since this will be donated in my cancer hat project, a little large is good. I also finished it off with a slightly different edge -- forgoing the roll up brim.
This was a case of where I began with the written instructions. Unlike most patterns, I had to carefully mark off each pattern repeat and it took great concentration to make sure that I maintained the increases correctly. It was very important when I finally began the body of the hat and got into the full-fledged cables and twists and popcorns. At that point, I switched to the crochet symbol diagram as it gave me a clear impression of what each row looked like and how they interacted as a whole.
When making the mint green version, I discovered a great tip (darn! can't remember where now) that said to take recipe cards and transfer the symbol crochet pattern, one row to one card through one pattern repeat. WOW! What a great idea! I did exactly that. I recreated the symbols, line by line on 6 cards (6 rows make one full pattern). These were easier to carry and I never lost my place in the pattern. It made making the second hat a breeze!
What do you think?
Wednesday, August 24, 2011
Marian De Young: 1924 - 2011
My wonderful mom passed away in her sleep on Sunday, August 21. She would have been 87 at the end of this month.
Mom had a series of strokes within the last couple of years and has been bed-ridden for the last six months. Her passing was quiet and peaceful.
I love you, Mom!
Mom had a series of strokes within the last couple of years and has been bed-ridden for the last six months. Her passing was quiet and peaceful.
I love you, Mom!
Sunday, June 19, 2011
Hairpin Lace Scarf
I've finally finished (and photographed) the hairpin lace shawl I made for a young friend of mine who just graduated from the university.
Here is a shot of the shawl draped over my wicker form. This shawl is comprised of 5 strips of hairpin lace with the center strip having an extra twist in the loops.
As you can see in the photo above, I twisted the loops twice before joining with a stitch.
Okay, so now you've seen the finished shawl -- how did I make it? First, you need a hairpin loom and a crochet hook. By working around the loom and crocheting down the center, you create the base of a very pretty lace.
At the top of the photo, you can see the Boye Hairpin Loom that I recently purchased. I used Caron's Dazzleaire yarn in a lovely bone color. The pattern called for 240 loops on each side. In order to keep track of the loops as I worked (and to allow me to slide off completed groups), I used safety pins to hold 10 loops together. I could easily keep track of the number of loops this way. The pattern actually gathered only 5 loops at a time, which was also easy to keep track of with the 10 loop groups.
Once you've got a 240 loop strip complete, you join the 5 loop groups into an edge with chains in between.
Finally, you attach the strips together with more chains worked between the rows to form a pretty diamond pattern.
I am so very pleased with the finished piece, that I think that I will make myself the same shawl (pattern from Red Heart Yarn's Hairpin Lace Shawl). Maybe in a pale brown or dark green color for the fall season.
My next project is a cotton dress for my granddaughter, Alexa. Hope to show it off soon.
In my last blog, someone asked me to post a photograph of my completed Mystery Crochet Pattern purse, so here it is!!!!
Here is a shot of the shawl draped over my wicker form. This shawl is comprised of 5 strips of hairpin lace with the center strip having an extra twist in the loops.
As you can see in the photo above, I twisted the loops twice before joining with a stitch.
Okay, so now you've seen the finished shawl -- how did I make it? First, you need a hairpin loom and a crochet hook. By working around the loom and crocheting down the center, you create the base of a very pretty lace.
At the top of the photo, you can see the Boye Hairpin Loom that I recently purchased. I used Caron's Dazzleaire yarn in a lovely bone color. The pattern called for 240 loops on each side. In order to keep track of the loops as I worked (and to allow me to slide off completed groups), I used safety pins to hold 10 loops together. I could easily keep track of the number of loops this way. The pattern actually gathered only 5 loops at a time, which was also easy to keep track of with the 10 loop groups.
Once you've got a 240 loop strip complete, you join the 5 loop groups into an edge with chains in between.
Finally, you attach the strips together with more chains worked between the rows to form a pretty diamond pattern.
I am so very pleased with the finished piece, that I think that I will make myself the same shawl (pattern from Red Heart Yarn's Hairpin Lace Shawl). Maybe in a pale brown or dark green color for the fall season.
My next project is a cotton dress for my granddaughter, Alexa. Hope to show it off soon.
In my last blog, someone asked me to post a photograph of my completed Mystery Crochet Pattern purse, so here it is!!!!
I REALLY LOVE THE WAY THIS TURNED OUT!!!
Saturday, April 2, 2011
Amigurumi Love
I've been wanting to try my hand at amigurumi for a while now. This is the Japanese crochet technique of making stuffed dolls and animals using single crochet, very tight, using a circular, spiral pattern to create the head, body and arms of your project. Stuffing is done as you create your animal with standard polyester fill.
I planned to make my granddaughter a crochet animal for her 2nd birthday this month, so I bought a Pound of Caron yarn in a light brown color and small amounts of red and bone colored Caron's Simply Soft. Using an amigurumi monkey pattern, I made the usual changes (I can't crochet without changing some part of the pattern) and created a Sock Monkey!
Now the amigurumi part . . .
Since no one would supply Easter candy for my bowl (this is our Spring piece at my job), I decided to see if I could find a pattern for Easter eggs.
Wouldn't you know it, my favorite yarn website (Lion Brand Yarn) had a great pattern for amigurumi eggs! My young friend from the nearby university gave me for my birthday some wonderful Red Heart yarn in a multi-color skein that just shouted out EASTER! So in between making the arms and legs of the sock monkey, I created little gems of Easter eggs!
I also took the opportunity to try my hand at spike stitches as you can see on the egg in the upper left!
The eggs looked a little lost in the bowl, so I created "grass" from green copy paper cut very thin on an office paper cutter.
I think the entire effect is wonderful!
What do you think?
I planned to make my granddaughter a crochet animal for her 2nd birthday this month, so I bought a Pound of Caron yarn in a light brown color and small amounts of red and bone colored Caron's Simply Soft. Using an amigurumi monkey pattern, I made the usual changes (I can't crochet without changing some part of the pattern) and created a Sock Monkey!
Sock Monkey on Laptop and Quilt Rack
I think he turned out great! The original pattern called for the bone color for the entire muzzle and the nostrils and mouth were to be embroidered on. The body was entirely to be done in the brown. For a true sock monkey, the mouth was to be red and the little bottom was also to be red (for the original work socks had red toes and red heels). So I took the small amount of red and crocheted the red mouth on the muzzle and worked out the placement of red for his little bottom!
I think this was completely successful!
BUT IT DOESN'T STOP THERE!
Before I started the monkey, I tried my hand at the technique of holding 2 strands of yarn together to obtain interesting colors or textures. My friend, Sue, who donates yarn to me for my cancer hat project, provided 2 nice spring colors of Caron's Simpy Soft, a soft yellow and sage. I began making a hat with these two colors together, but soon found the stitches to be thicker and stiffer. So I made the circle for the crown of the hat a little larger to accommodate the stiffer stitching. Wouldn't you know, after I began creating the sides, I realized that the hat was waaaaaayyyyyyy too big. I took it to my friend Sue to get her opinion and yes, it was too big. But, as I held it with the top in the palm of my hand, Sue exclaimed that the piece would make a great bowl. So instead of tearing the previous rows out to make it smaller, I just continued until it was a nice little bowl. Then to make it more spring-like, I added a crocheted daffodil!
Since no one would supply Easter candy for my bowl (this is our Spring piece at my job), I decided to see if I could find a pattern for Easter eggs.
Wouldn't you know it, my favorite yarn website (Lion Brand Yarn) had a great pattern for amigurumi eggs! My young friend from the nearby university gave me for my birthday some wonderful Red Heart yarn in a multi-color skein that just shouted out EASTER! So in between making the arms and legs of the sock monkey, I created little gems of Easter eggs!
I also took the opportunity to try my hand at spike stitches as you can see on the egg in the upper left!
The eggs looked a little lost in the bowl, so I created "grass" from green copy paper cut very thin on an office paper cutter.I think the entire effect is wonderful!
What do you think?
Monday, March 7, 2011
Spring is Closing In!
This weekend I was busy with multiple crochet projects.
I decided to attempt a new technique of crocheting 2 strands of yarn together. You can choose 2 complimentary (or contrasting) colors or 2 different textures of yarn for entirely new looks. My friend Sue, who donates yarn to me for creating soft comfort hats for cancer patients, presented me with a skein of Simply Soft Sunshine and a skein of Simply Soft Soft Sage. I decided they were nice colors and decided to make a hat holding both yarns together. It was turning out beautifully, a nice thick double crochet post and the colors were really very nice. It also ended up a bit stiffer than I'm used to, so I increased the size to compensate for the lack of stretch. WELL . . .
Long story short, I continued for a few more rows, topped it off with a crab stitch row and made a pretty little crocheted daffodil for the front and here is my Spring basket!
What do you think?
I decided to attempt a new technique of crocheting 2 strands of yarn together. You can choose 2 complimentary (or contrasting) colors or 2 different textures of yarn for entirely new looks. My friend Sue, who donates yarn to me for creating soft comfort hats for cancer patients, presented me with a skein of Simply Soft Sunshine and a skein of Simply Soft Soft Sage. I decided they were nice colors and decided to make a hat holding both yarns together. It was turning out beautifully, a nice thick double crochet post and the colors were really very nice. It also ended up a bit stiffer than I'm used to, so I increased the size to compensate for the lack of stretch. WELL . . .
The hat soon became too large. I was holding it up on my palm with the top down and the sides up explaining to Sue that I would have to pull out a few rows to shrink the size, when she pointed out that it looked like a pretty basket! I looked at it again and sure enough, it was a pretty Spring basket! So I thought, "what the heck!" we'll use it as a candy dish in our department.
Long story short, I continued for a few more rows, topped it off with a crab stitch row and made a pretty little crocheted daffodil for the front and here is my Spring basket!
This weekend was also a Women's Health Fair at our small local hospital. This being the first year for this event, I decided to bring a small skein of yarn to keep me busy while waiting for some of the free sessions that were offered. I had a small amount of pink / white yarn from my very first cancer hat, so I thought I'd try my hand at making a necklace choker. I knew I had a couple of loose pendants (without chains) that might work nicely as charms on the choker, so I quickly worked up rows of a single crochet / double crochet pattern that looks pretty and in less than an afternoon, I had this great necklace. My hubby helped me chose the charm and button for the clasp and I finished this up lickety split!
Sunday, January 9, 2011
New Year
Well, it's a new year. To be honest, I'm glad to be rid of 2010 and hope that 2011 will be a bit brighter for my family and friends. It seems that this last year was trying for everyone -- my Mom suffered a total of 7 strokes that has finally left her in a near coma, but at home with my Dad under home hospice care. One of my dear younger friends has been struggling with her sister's lymphoma and slow recovery. My DH is still getting weaker and experiencing more and more difficulty getting around. And everyone is suffering from the sluggish economy and high gas prices. Sigh!
I have been crocheting my little fingers off (well, not really) amidst all of this turmoil. I completed both sides of my lacy tunic, but without a way to properly block it, I haven't finished this wonderful project. I really need to block the pieces before I sew them together into a warm lacy cowl tunic. Then I made 9 Nubby Mitts for my co-workers holiday gifts, one basket weave, shell edging baby afghan for another co-worker, and warm, soft, fuzzy mittens for my younger friend in Dekalb. I also made Mukluk slippers for my soon-to-be granddaughter (who is going to be 2 years old in April) and men's wristers for my son and lacy wristers for his fiance.
Finally, my biggest project was making a Helmet Liner / Ski Mask for a friend of my older sister. Her son is stationed in Afghanistan and requested one of the liners. It was my opportunity to work with 100% wool, which I've avoided for years. Since this was a special order and going to a member of our military, I used Lion Brand's Fisherman's Wool in dark brown. It contains lanolin and is waterproof as well as warm. I started with a pattern I found online by Ann B. but as I tend to do, I started making changes from the get-go. The pattern did not have any finished dimensions, and when I began the standard hat increases, I realized that the crown was going to be way too small. So I just keep increasing until the diameter of the crown reached 7 to 7 1/2 inches across (the difference is that wool tends to make the circle a hexagon where the stitches are increased. I measured 7 1/2 inches from a point to a point). The next change I made was at the opening for the eyes. I did one single crochet decrease in each side of the opening after 3 rows. This actually shaped the opening a little better than a slash. Finally, after crocheting 7 more inches from the eye opening, I found the halfway point in the front and back and worked more single crochet decreases so that the head tapered slightly to the neck. Since the pattern creates a full head with the yarn continuing down to cover the neck, I decided that the subtle shaping would help keep the warmth around the neck.
After all is said and done, I'm glad that I had the opportunity to make this liner, but I couldn't afford to make any more as the Fisherman's Wool was pretty expensive. Add to that the fact that I think I had a skin reaction to the wool (not certain, though), I think this is one charitable project I will pass up. Hats for cancer patients will continue to be my passion.
I hope this new year will bring you happiness, health and a wealth of fun projects!
P.S. For images of my recent projects, please visit my Photo Gallery page.
I have been crocheting my little fingers off (well, not really) amidst all of this turmoil. I completed both sides of my lacy tunic, but without a way to properly block it, I haven't finished this wonderful project. I really need to block the pieces before I sew them together into a warm lacy cowl tunic. Then I made 9 Nubby Mitts for my co-workers holiday gifts, one basket weave, shell edging baby afghan for another co-worker, and warm, soft, fuzzy mittens for my younger friend in Dekalb. I also made Mukluk slippers for my soon-to-be granddaughter (who is going to be 2 years old in April) and men's wristers for my son and lacy wristers for his fiance.
Finally, my biggest project was making a Helmet Liner / Ski Mask for a friend of my older sister. Her son is stationed in Afghanistan and requested one of the liners. It was my opportunity to work with 100% wool, which I've avoided for years. Since this was a special order and going to a member of our military, I used Lion Brand's Fisherman's Wool in dark brown. It contains lanolin and is waterproof as well as warm. I started with a pattern I found online by Ann B. but as I tend to do, I started making changes from the get-go. The pattern did not have any finished dimensions, and when I began the standard hat increases, I realized that the crown was going to be way too small. So I just keep increasing until the diameter of the crown reached 7 to 7 1/2 inches across (the difference is that wool tends to make the circle a hexagon where the stitches are increased. I measured 7 1/2 inches from a point to a point). The next change I made was at the opening for the eyes. I did one single crochet decrease in each side of the opening after 3 rows. This actually shaped the opening a little better than a slash. Finally, after crocheting 7 more inches from the eye opening, I found the halfway point in the front and back and worked more single crochet decreases so that the head tapered slightly to the neck. Since the pattern creates a full head with the yarn continuing down to cover the neck, I decided that the subtle shaping would help keep the warmth around the neck.
After all is said and done, I'm glad that I had the opportunity to make this liner, but I couldn't afford to make any more as the Fisherman's Wool was pretty expensive. Add to that the fact that I think I had a skin reaction to the wool (not certain, though), I think this is one charitable project I will pass up. Hats for cancer patients will continue to be my passion.
I hope this new year will bring you happiness, health and a wealth of fun projects!
P.S. For images of my recent projects, please visit my Photo Gallery page.
Saturday, November 13, 2010
Multiple Projects Help Carpal Tunnel
I was just reading Switching Your Stitching by Andee Graves (Crochet Uncut, Fall, 2010 Issue), who was suggesting that if we plan to crochet for a long period of time (say an afternoon or maybe the entire Saturday), you should switch between projects using different size hooks, or maybe even greatly differing stitch patterns. I've been doing this for a while now. I think I mentioned it in previous post, but I usually have more than one project going at the same time.
This weekend, I'm working on three projects at the same time. The first, is a gift for my supervisor (who loves chocolate), I'm crocheting one of my Nubby Mitts in Sugar N Cream colors of Chocolate, one of their ombre shades. The mitt is actually a little browner than the picture shows. It really does look like white chocolate, milk chocolate and dark chocolate sections. Pretty wild! I'm using 100% cotton with a size "I" crochet hook.
The second that I'm working on is another of my designs, the Cabled Fur Hat, that I'm making for my charity project, cancer comfort hats. My co-worker donated a skein of Caron Simply Soft in dark country blue. I'm using a bit of Fun Fur (donated by my friend, Niki, in Dekalb), in citrus color. I start with a basic beanie pattern, but as I crochet down the sides, I create cables every three stitches (3 triple crochet cable stitches, 3 double crochet stitches). This creates a pretty hat and the splash of fur along the brim adds to the whimsy. I hope it adds a smile to the face of someone facing one of the hardest times of their life.
This project uses a size "H" hook, which isn't that different in size from a size "I" hook, but the intricate weaving of the cable requires an entirely different rhythm from the single crochet, popcorn stitch that I use in my Nubby Mitt. My hands feel less strain when I switch to this other project after crocheting a bunch of those, let me tell you. They're just single crochets, and the popcorn stitch uses the same motion as for double crochets. Plus the feel of the Simply Soft is so different than the 100% cotton yarn.
The last project that I'm working on simultaneously, is for ME! I'm making a luxurious Lacy tunic, from Lion Brand's free crochet patterns. I'm going off on my own with gauge and hook size, though. The pattern calls for a size "I" hook, but I'm using a big size "M" bamboo handle hook. The suggested yarn is silk mohair, but I was able to purchase skeins of Rowan Yarn's Cashsoft, which is a merino wool, acrylic and cashmere blend yarn that is yummy! My favorite online fabric source is now carrying luxury yarns and they had a blowout sale of fabrics and yarn. 70% off was just too much to pass up and I'm finally getting my cashmere top that I've always wanted. This pattern is a beautiful shell pattern with intriguing solid areas to make a pretty tunic top. Best of all, this pattern is crocheted in 2 rectangles and are just stitched up the sides leaving an area for the armholes and a turned down neck into a soft cowl. I've finished the first rectangle and now I'm working on the second. No need to tell you that the yarn is simply heavenly to work with. It's soft and warm and just downright pretty!
The change in hook is so drastic with this project, that my hand doesn't get strained by the repetitive motion. The bamboo handle provides an entirely different grip than my Clover Soft Touch ergonomic hooks, but it's still so comfortable. I love the smoothness of the wood.
So I guess I'm doing my hands a favor without really thinking about it. I mean, this allows me to enjoy seeing all of these projects transform into finished pieces. Not to mention this keeps me on track to finishing all of them without getting tired of doing the same thing.
This weekend, I'm working on three projects at the same time. The first, is a gift for my supervisor (who loves chocolate), I'm crocheting one of my Nubby Mitts in Sugar N Cream colors of Chocolate, one of their ombre shades. The mitt is actually a little browner than the picture shows. It really does look like white chocolate, milk chocolate and dark chocolate sections. Pretty wild! I'm using 100% cotton with a size "I" crochet hook.
The second that I'm working on is another of my designs, the Cabled Fur Hat, that I'm making for my charity project, cancer comfort hats. My co-worker donated a skein of Caron Simply Soft in dark country blue. I'm using a bit of Fun Fur (donated by my friend, Niki, in Dekalb), in citrus color. I start with a basic beanie pattern, but as I crochet down the sides, I create cables every three stitches (3 triple crochet cable stitches, 3 double crochet stitches). This creates a pretty hat and the splash of fur along the brim adds to the whimsy. I hope it adds a smile to the face of someone facing one of the hardest times of their life.
This project uses a size "H" hook, which isn't that different in size from a size "I" hook, but the intricate weaving of the cable requires an entirely different rhythm from the single crochet, popcorn stitch that I use in my Nubby Mitt. My hands feel less strain when I switch to this other project after crocheting a bunch of those, let me tell you. They're just single crochets, and the popcorn stitch uses the same motion as for double crochets. Plus the feel of the Simply Soft is so different than the 100% cotton yarn.
The last project that I'm working on simultaneously, is for ME! I'm making a luxurious Lacy tunic, from Lion Brand's free crochet patterns. I'm going off on my own with gauge and hook size, though. The pattern calls for a size "I" hook, but I'm using a big size "M" bamboo handle hook. The suggested yarn is silk mohair, but I was able to purchase skeins of Rowan Yarn's Cashsoft, which is a merino wool, acrylic and cashmere blend yarn that is yummy! My favorite online fabric source is now carrying luxury yarns and they had a blowout sale of fabrics and yarn. 70% off was just too much to pass up and I'm finally getting my cashmere top that I've always wanted. This pattern is a beautiful shell pattern with intriguing solid areas to make a pretty tunic top. Best of all, this pattern is crocheted in 2 rectangles and are just stitched up the sides leaving an area for the armholes and a turned down neck into a soft cowl. I've finished the first rectangle and now I'm working on the second. No need to tell you that the yarn is simply heavenly to work with. It's soft and warm and just downright pretty!
The change in hook is so drastic with this project, that my hand doesn't get strained by the repetitive motion. The bamboo handle provides an entirely different grip than my Clover Soft Touch ergonomic hooks, but it's still so comfortable. I love the smoothness of the wood.
So I guess I'm doing my hands a favor without really thinking about it. I mean, this allows me to enjoy seeing all of these projects transform into finished pieces. Not to mention this keeps me on track to finishing all of them without getting tired of doing the same thing.
Subscribe to:
Posts (Atom)